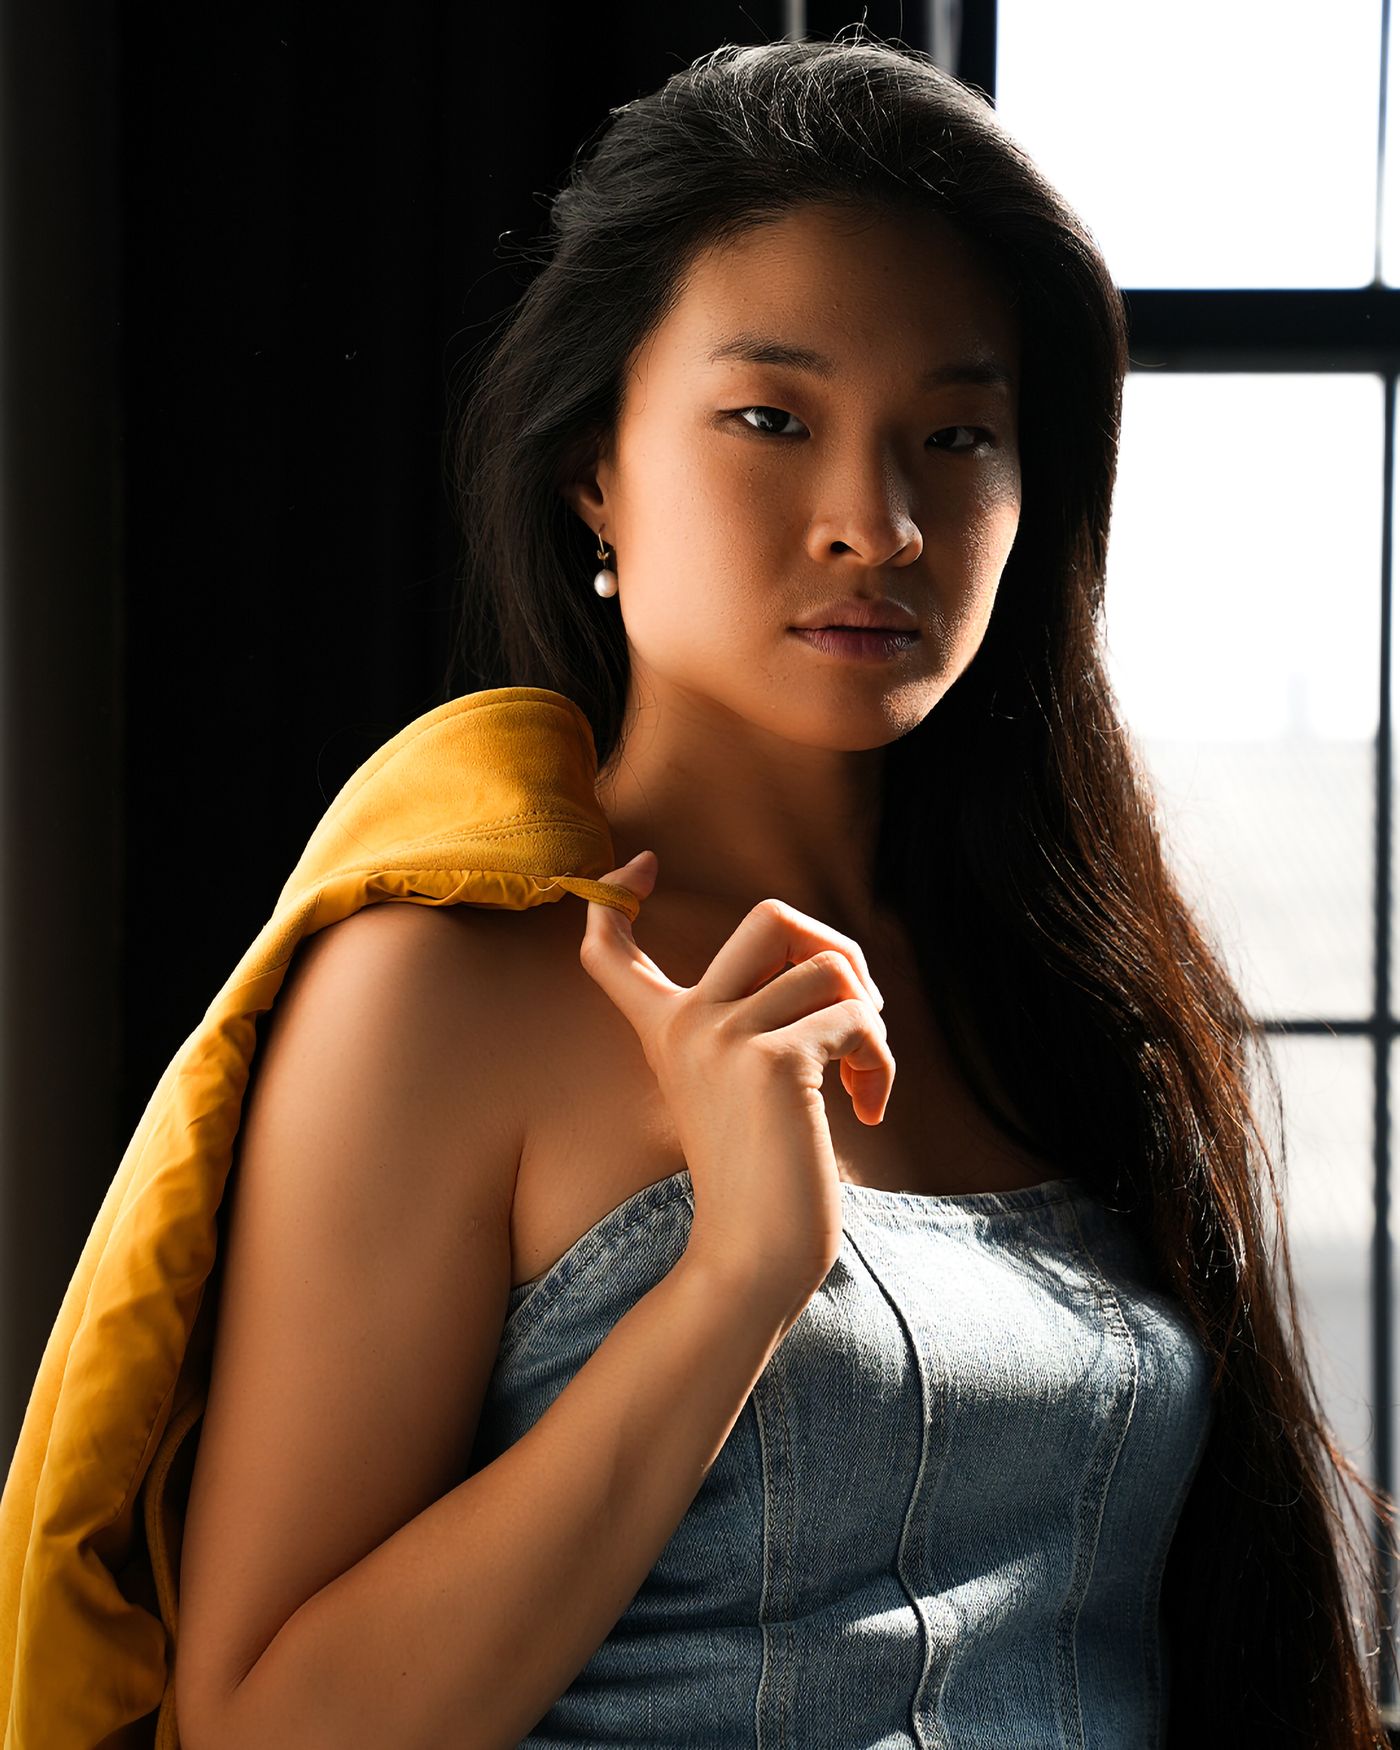
A window can provide enough light for a portrait without turning the room into a studio. The useful part is not simply brightness: the opening gives daylight a direction. One cheek can face the source while the other falls into shade, making small changes of head position visible. Begin with a willing subject, a quiet background and enough room to move around the chair.
Look at the patch of light before choosing a camera setting. Direct sun produces a harder shadow edge than an overcast sky or a window outside the sun's path. Both can work, but they create different pictures. For a first attempt, choose indirect daylight. If a sheer curtain softens direct sun, check that its colour is not tinting the face and that its pattern is not creating distracting shadows.
Arrange the face before the camera
Seat the person beside the window rather than directly in front of it with their back to the glass. Turn their shoulders slightly towards the light, then ask them to bring their face towards you. Stand where the lit cheek remains visible. A small turn of the nose changes how much of the far eye receives light; make these adjustments slowly instead of repeatedly moving the entire setup.
Watch the shadow under the nose and the brightness of the eye sockets. If the window is high and the person looks down, both eyes may become dark. Raising the chin a little or moving the chair farther from the wall can help. Do not force a pose for a textbook lighting pattern. An easy expression and a comfortable neck position matter more than making a perfect triangle on a cheek.
Leave some distance between the person and the background when the room permits it. That gives you more control over background detail and avoids a sharp head shadow against a nearby wall. Before shooting, look around the edges of the frame for sockets, curtain cords and bright objects. Moving the camera a few centimetres can remove a distraction without changing the light on the face.
Protect expression and skin detail
For a fairly still adult, a shutter speed around 1/160 second can be a starting point, not a guarantee. Increase it when the person talks, laughs or leans forward. Choose an aperture that leaves enough depth for the face; opening the lens completely may make the nearer eye sharp while the other eye falls outside the useful depth of field. Raise ISO when necessary rather than accepting movement blur solely to keep the ISO number low.
Focus on the nearer eye and review a magnified frame. Eye detection can help, but check which eye the camera actually selected. Set exposure from the face, then inspect bright forehead and cheek areas for lost detail. A window included in the composition may be much brighter than the skin. Decide whether retaining its view matters; trying to preserve every outdoor highlight can leave the person unnecessarily dark.
Switch off room lights that add an unwanted second colour. Make a reference frame with a neutral grey card in the same light as the face if consistent colour matters. Clouds can change brightness during the session, so repeat the exposure check when the light shifts. With automatic exposure, a change from a dark shirt to a pale shirt can also alter the camera's reading.
If the shaded cheek is darker than you want, bring a plain white board towards that side of the face, outside the frame. Start well back and move it closer until the shadow opens without disappearing. Compare one frame with it and one without. Keep the version that supports the expression, rather than assuming that brighter shadows always make a better portrait.